Getting
Started with Chirpstack LNS
Open the internet browser and go to this URL:
https://console.iot-lorawan.com
Creating
an Account
The very first step is to create an account to have access to the console;
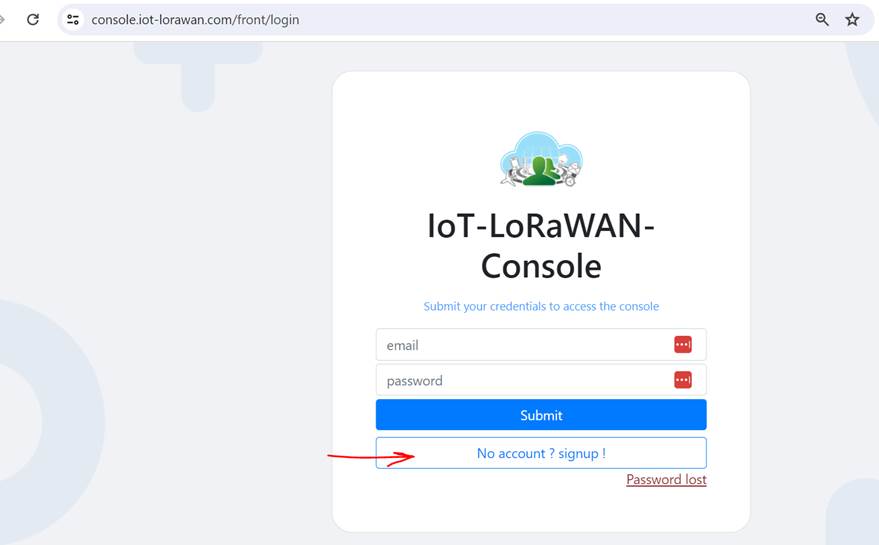
Create an account clicking on the “No Account ? signup !” button:
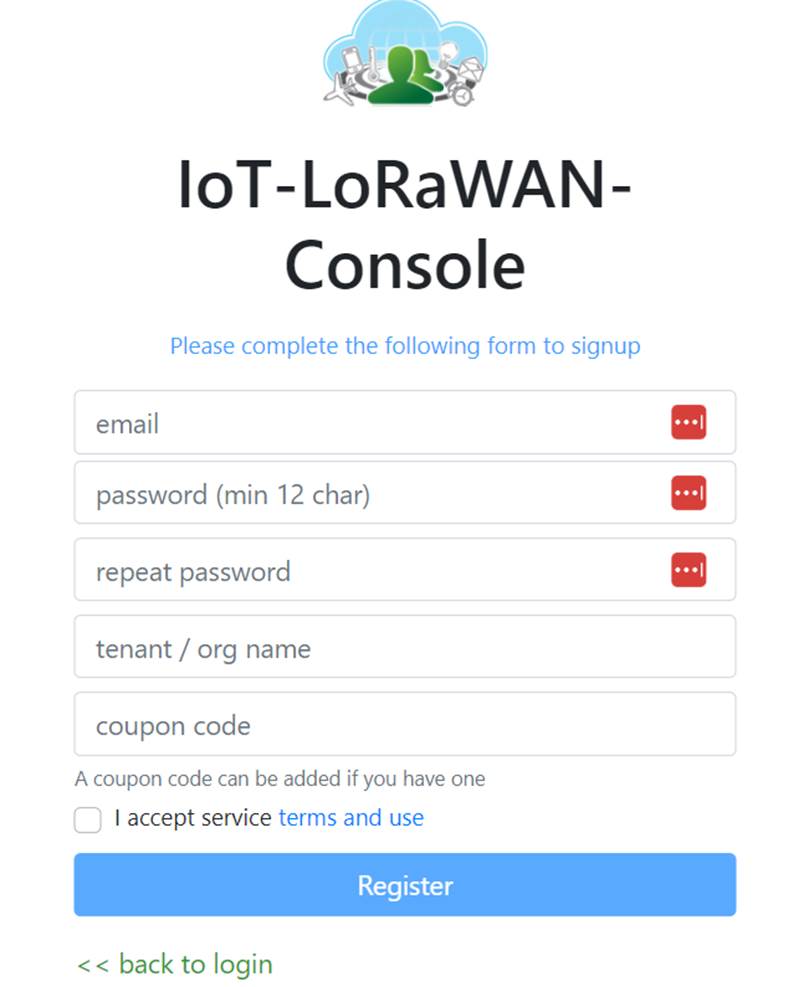
Complete the required information and check the “accept service terms and use”. Then click the “Register” button.
You should receive an email to VERIFY your email. Please check the SPAM folder in case you don’t see this email.
Once you get the email, please follow the instructions to make the email verification.
At this point, you should be able to sign-in in the IoT-LoRaWAN Console.
Adding a
Device Profile
Before adding devices to the console, you will need to define the device’s profiles. Each profile sets characteristics related to LoRaWAN protocol.
Once in the console, click “Device Profiles” at the Left Menu:
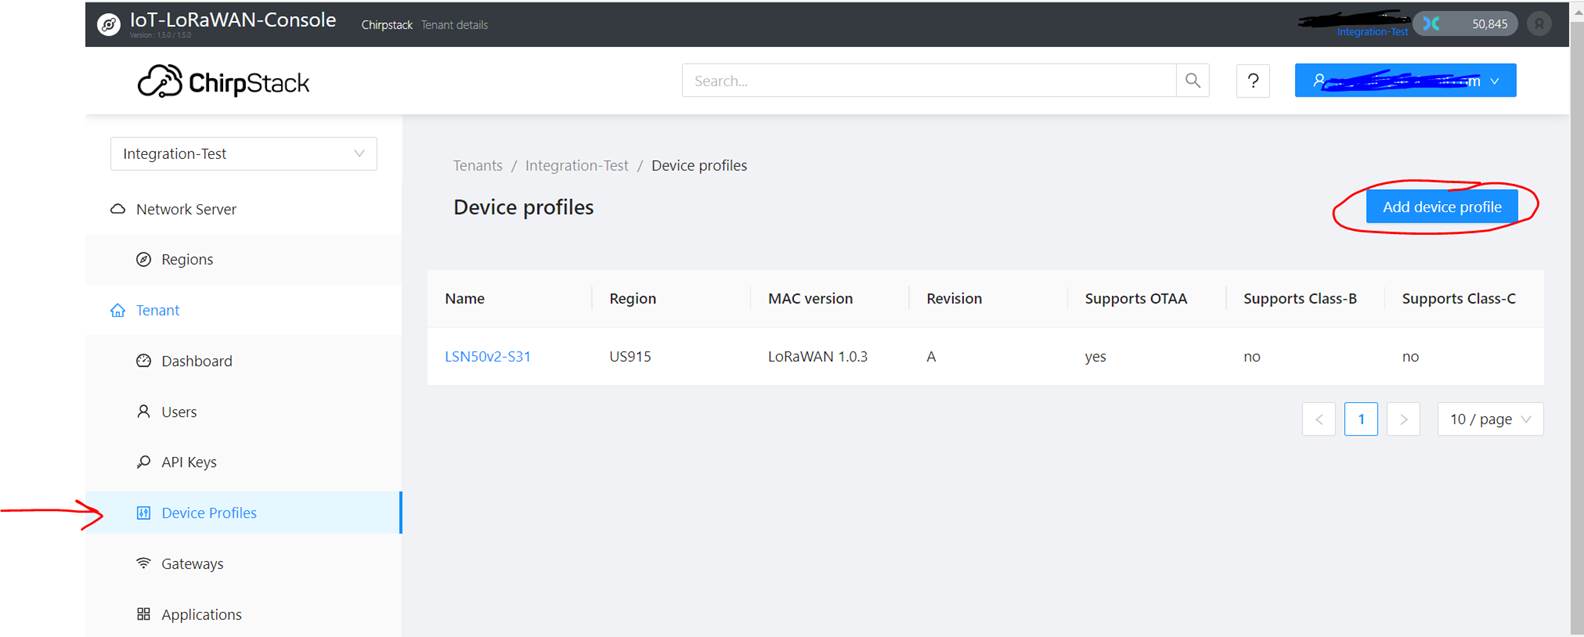
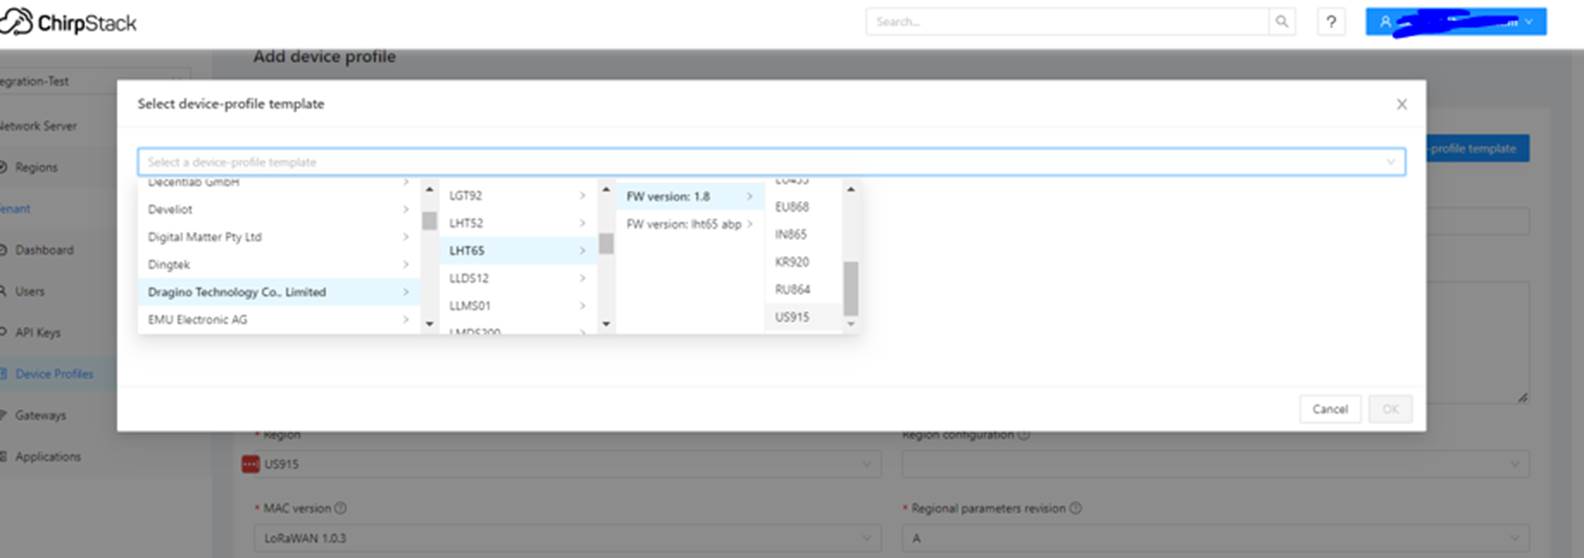
Click the “Add device profile” button. Enter the Name, and LoRaWAN-related parameters, or alternatively, use the “Select device-profile template" button to check if the device is already available from the Chirpstack Device Profiles Database (this repository contains information submitted by the device manufacturers). If that’s the case, you don’t have to provide the LoRaWAN information as it’s already provided by the template.
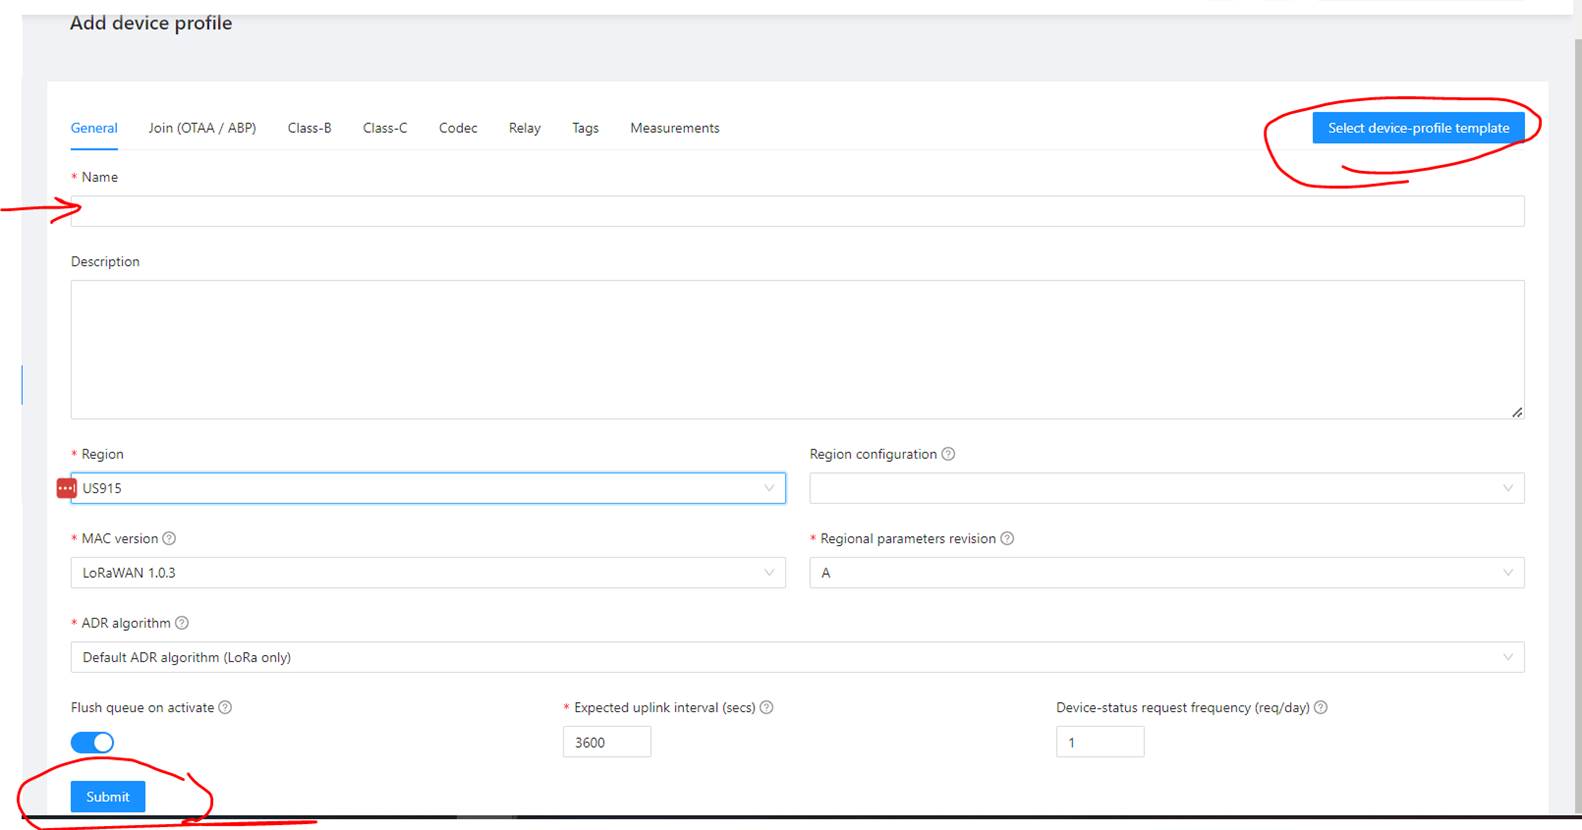
To select the profile template, after clicking the corresponding button, you will see a screen like below screenshot. Look up for the device manufacturer, device model, firmware version and finally select the Region corresponding to your case;
Once you select a template, information should look like this;
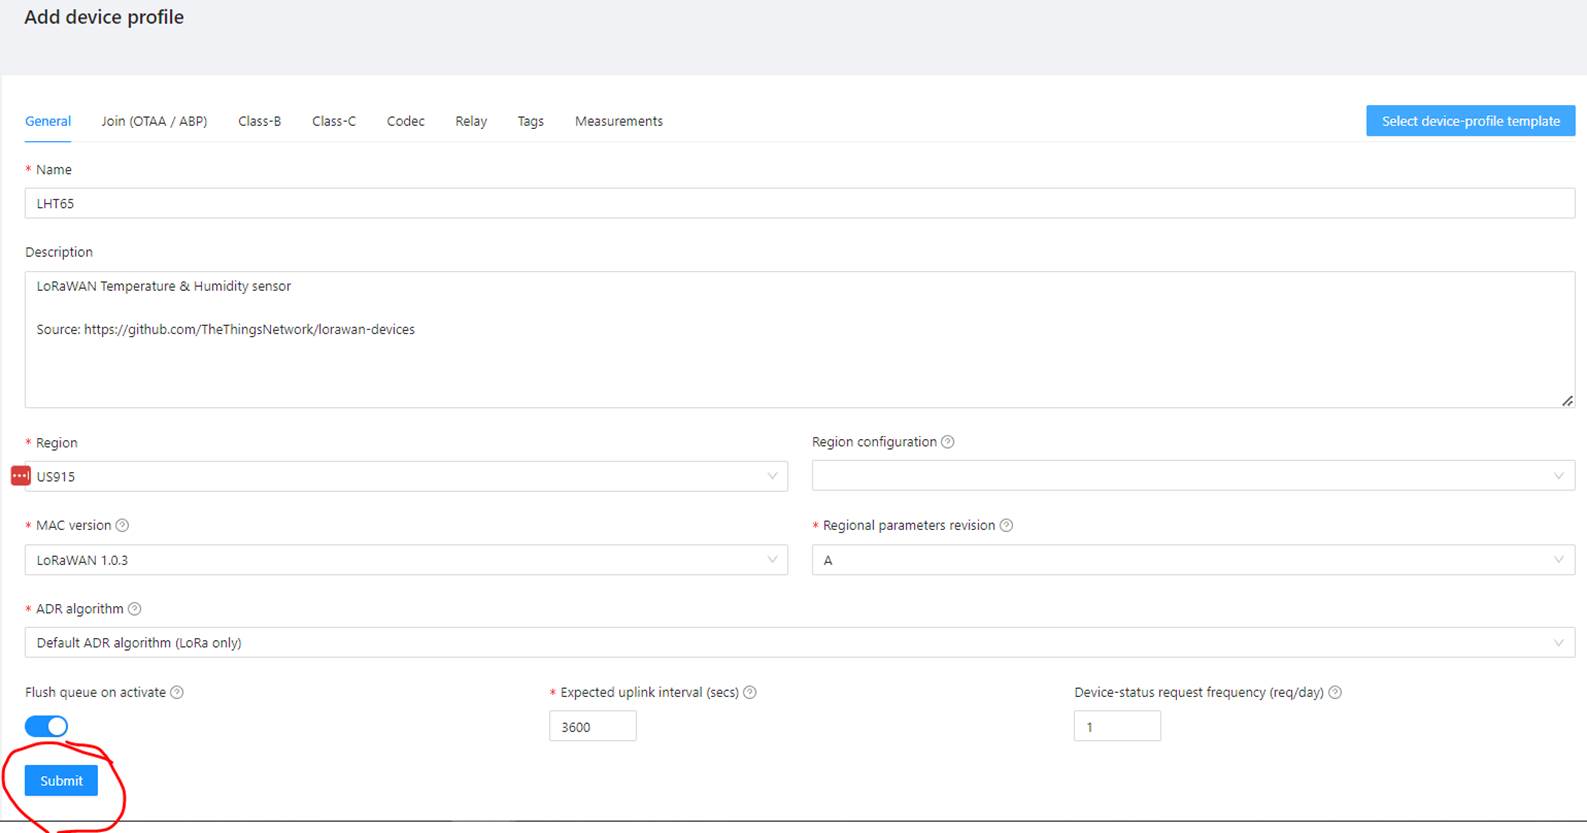
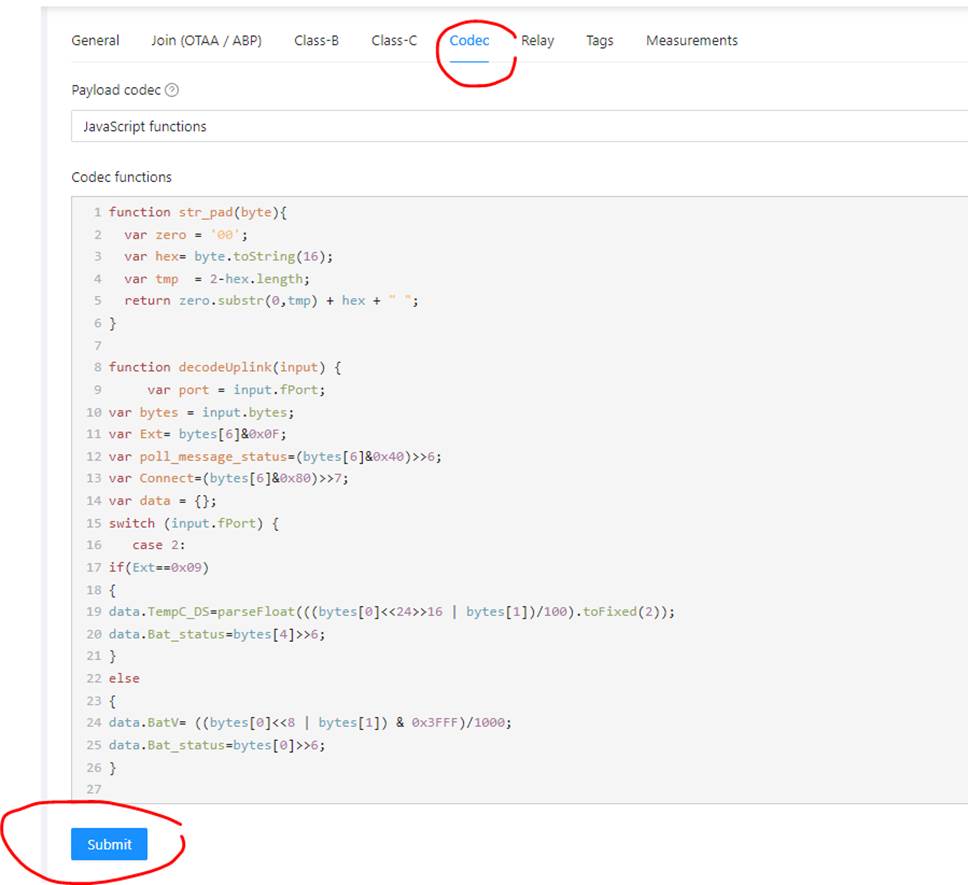
Once you submit the information, you will have the opportunity to modify certain parameters if needed. Please be sure the Codec is correct as it might need to be modified to match your specific requirements.
You can always come here later and make modifications.
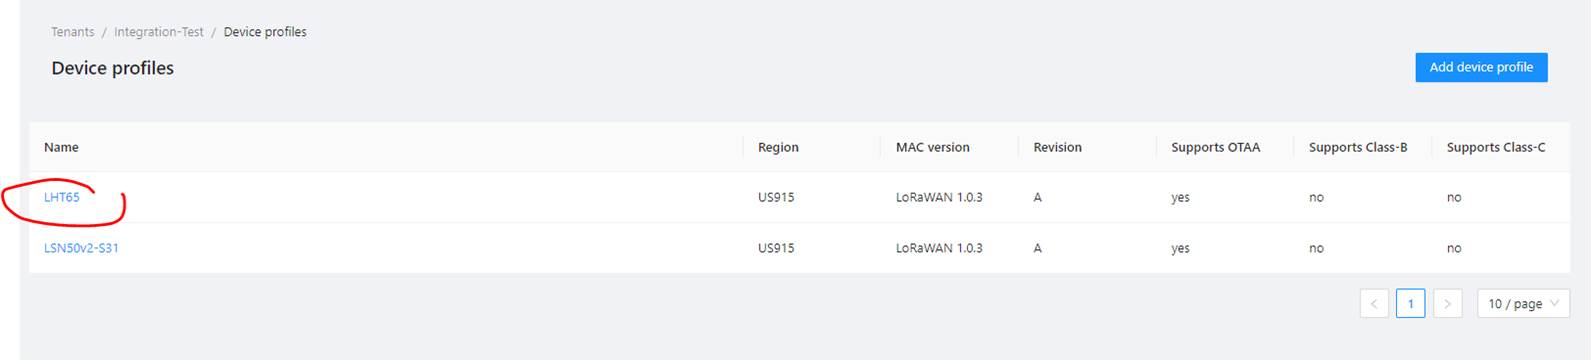
Once the device profile was submitted, you will see it in the Device profiles list;
Creating
an Application
Now that we have a device profile defined, we could start adding devices to the console. But since devices are grouped into “Applications”, we will need to define at least one before proceeding to adding our devices.
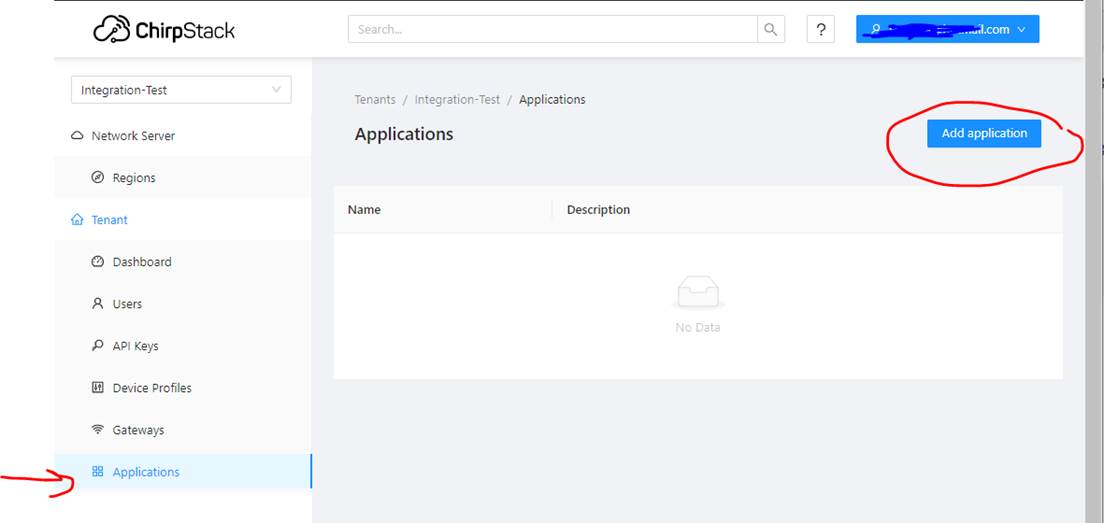
To add an application, select the “Applications” menu at the left, and click on “Add application” button;
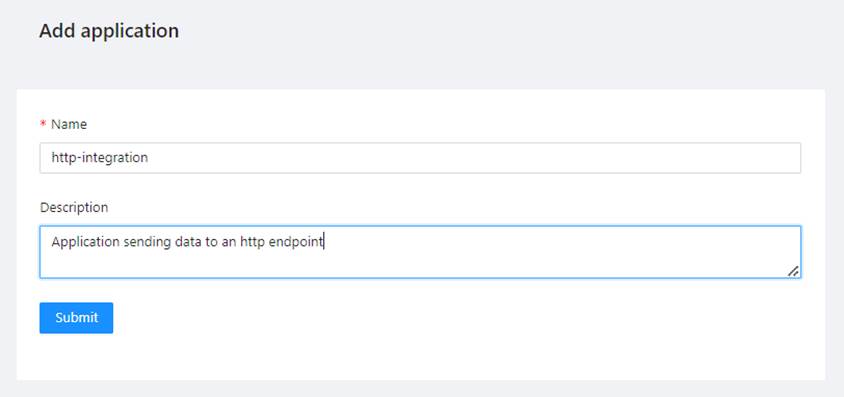
Enter a Name and (optional)
Description. Then, submit the information clicking on the “Submit” button;
Adding
Devices
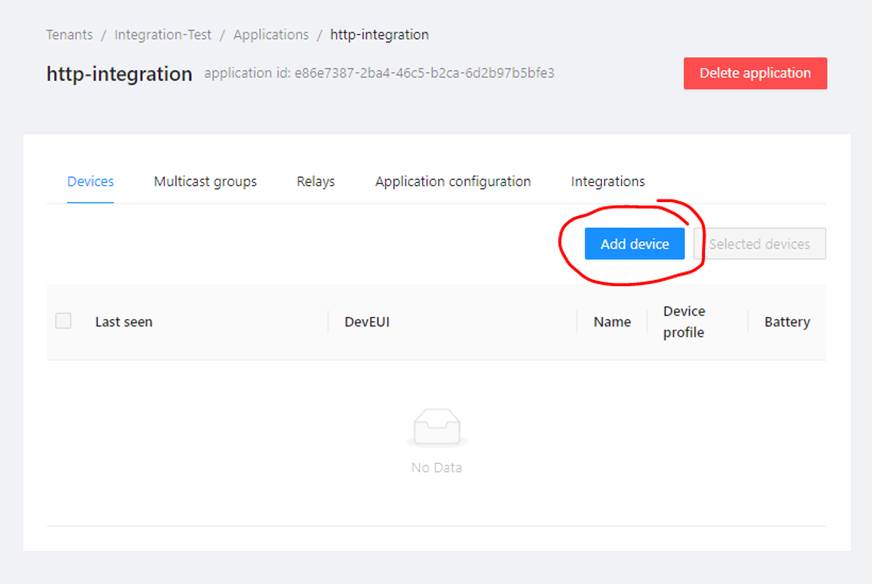
Once we have an application, we can start adding devices to it. Click on the “Add device" button;
Note: In order to add a device to a LoRaWAN network, you will need
to have certain parameters provided by the device manufacturer/seller. If the
device supports OTAA, you will be required to enter the Device EUI, Join EUI
and the Application key (depending on the LoRaWAN MAC version, this key might
be provided as the Network key, so be sure to clarify this with your device
provider).
Once in the Add device screen, please enter a Name, optionally a Description, and complete the Device EUI and Join EUI. Also, select the device profile form the list of profiles created in a previous step.
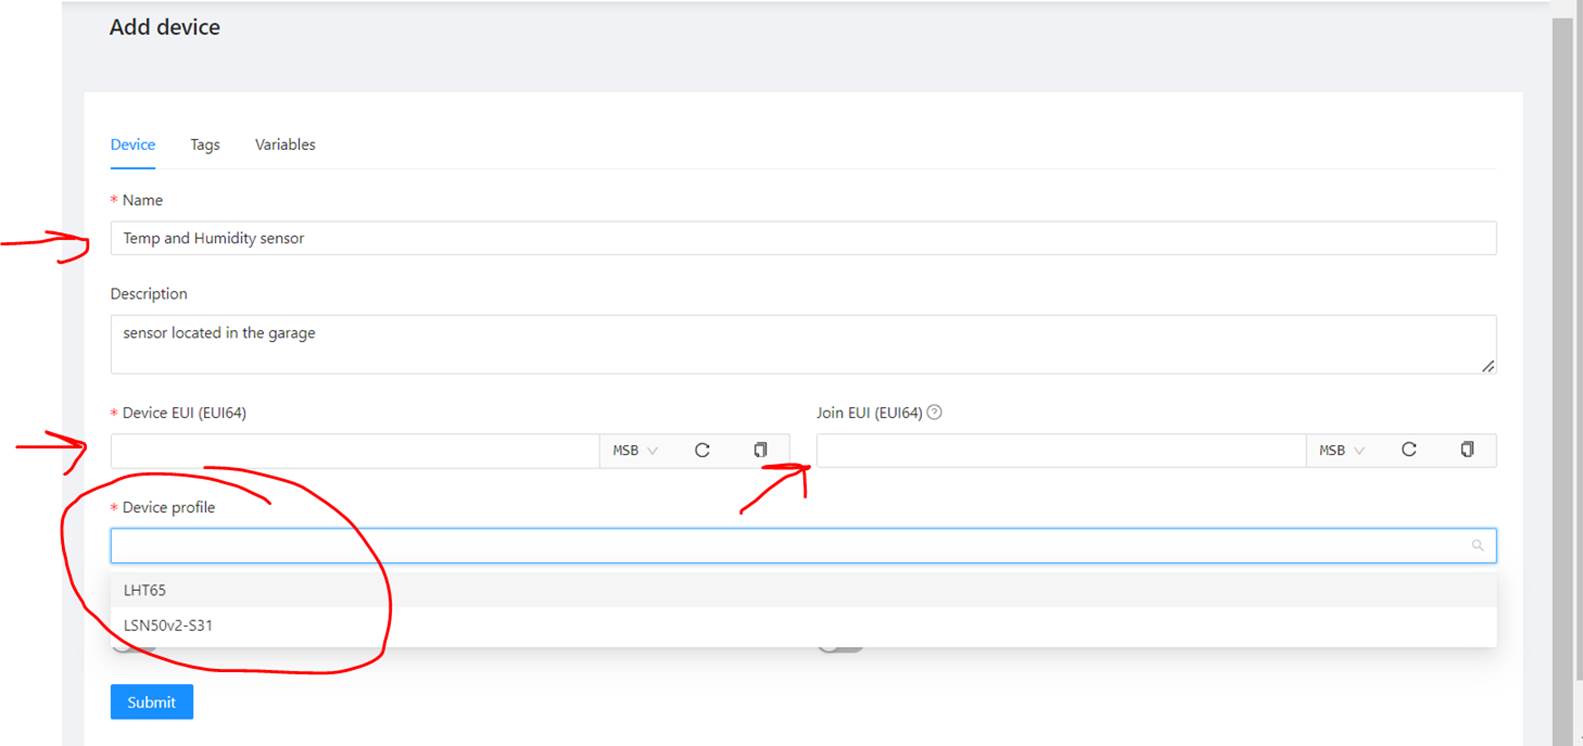
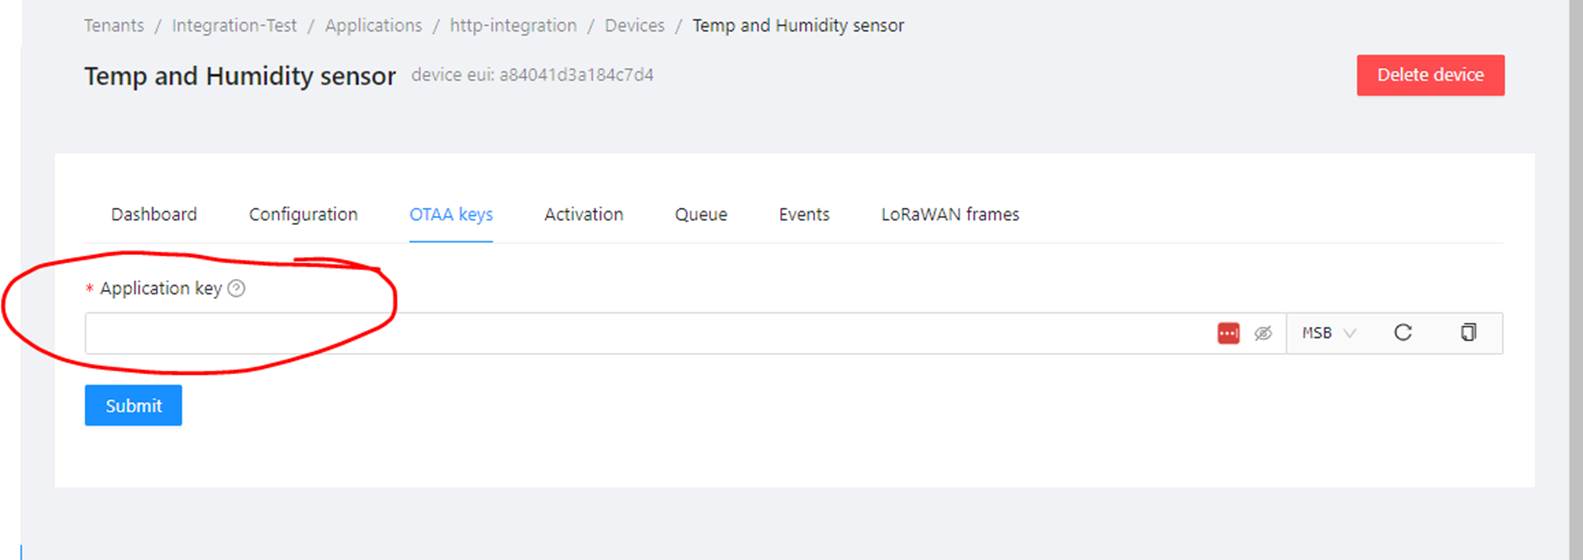
Once the above information is submitted, the Application key will be required to enter.
Once the device is created, the list of devices attached to the application will be shown;
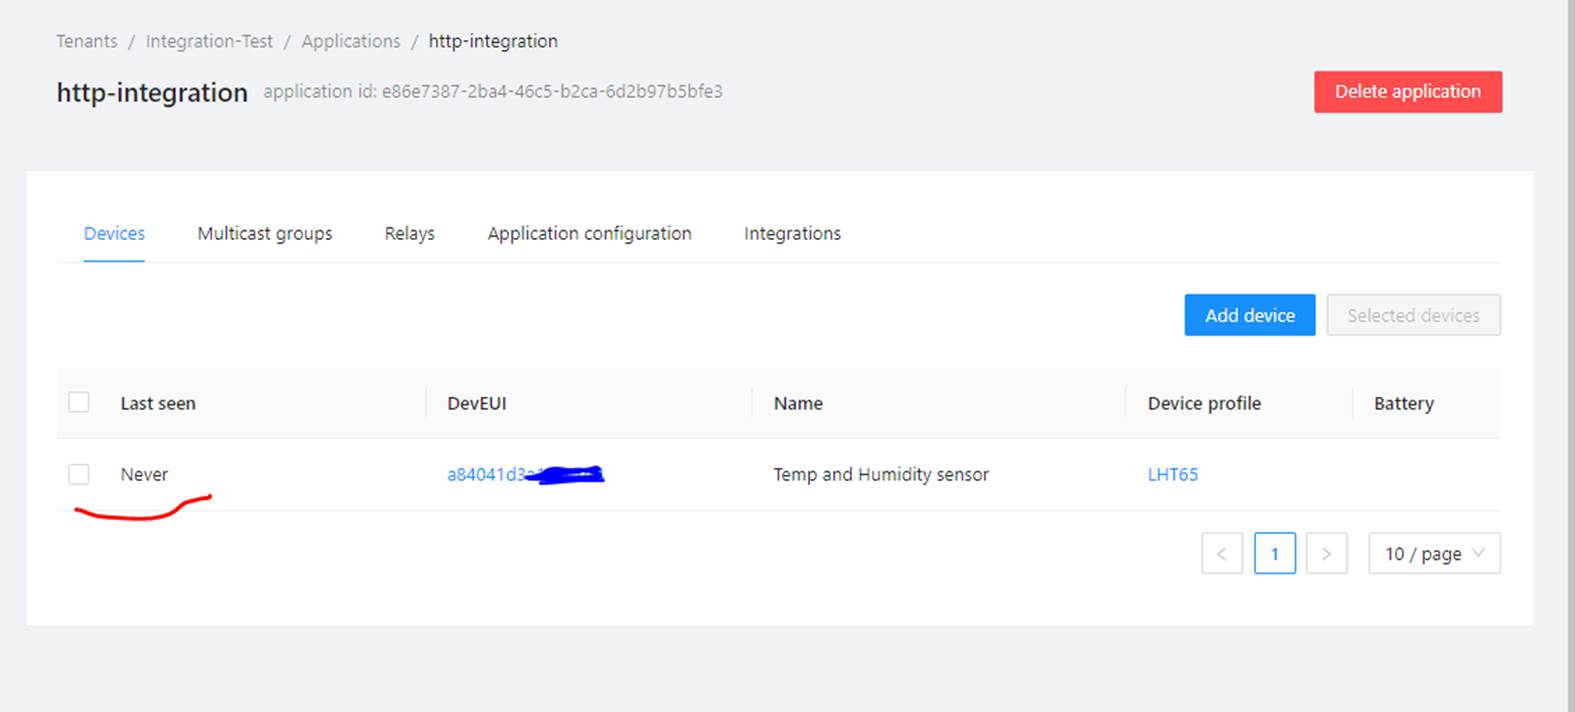
As we could see above, if the device never transmitted data to the LNS server, we would see “Never” in the “Last seen” column.
At this point, we can turn on the device and check if data arrives using either the “Event” or the “LoRaWAN frames” tabs;
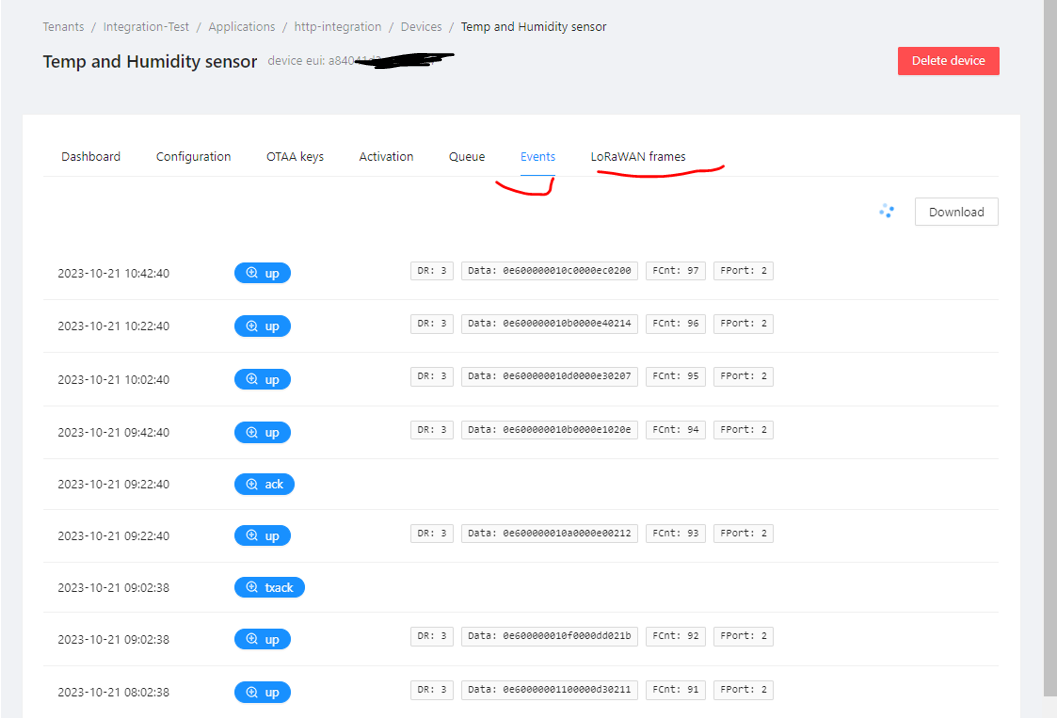
Clicking on the blue buttons above, will show us the content of each packet (in JSON format)
Creating
Integrations
Once we check the devices send data to the console, we could add “Integrations” to the Application, to forward the data to your application server (or end application).
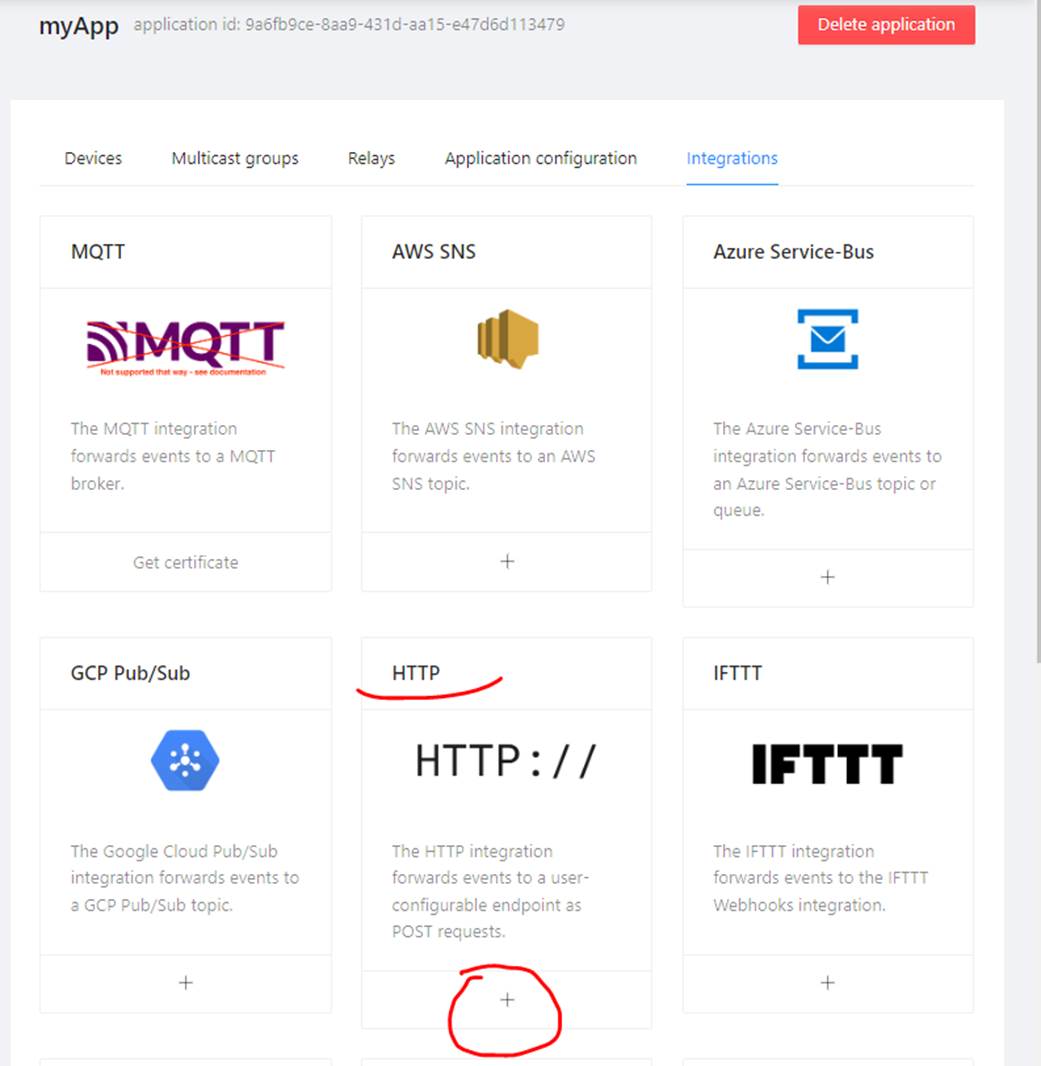
Below, you can see the different integrations Chirpstack offers
Note: MQTT is NOT supported.
Use HTTP instead (or any other available integration)
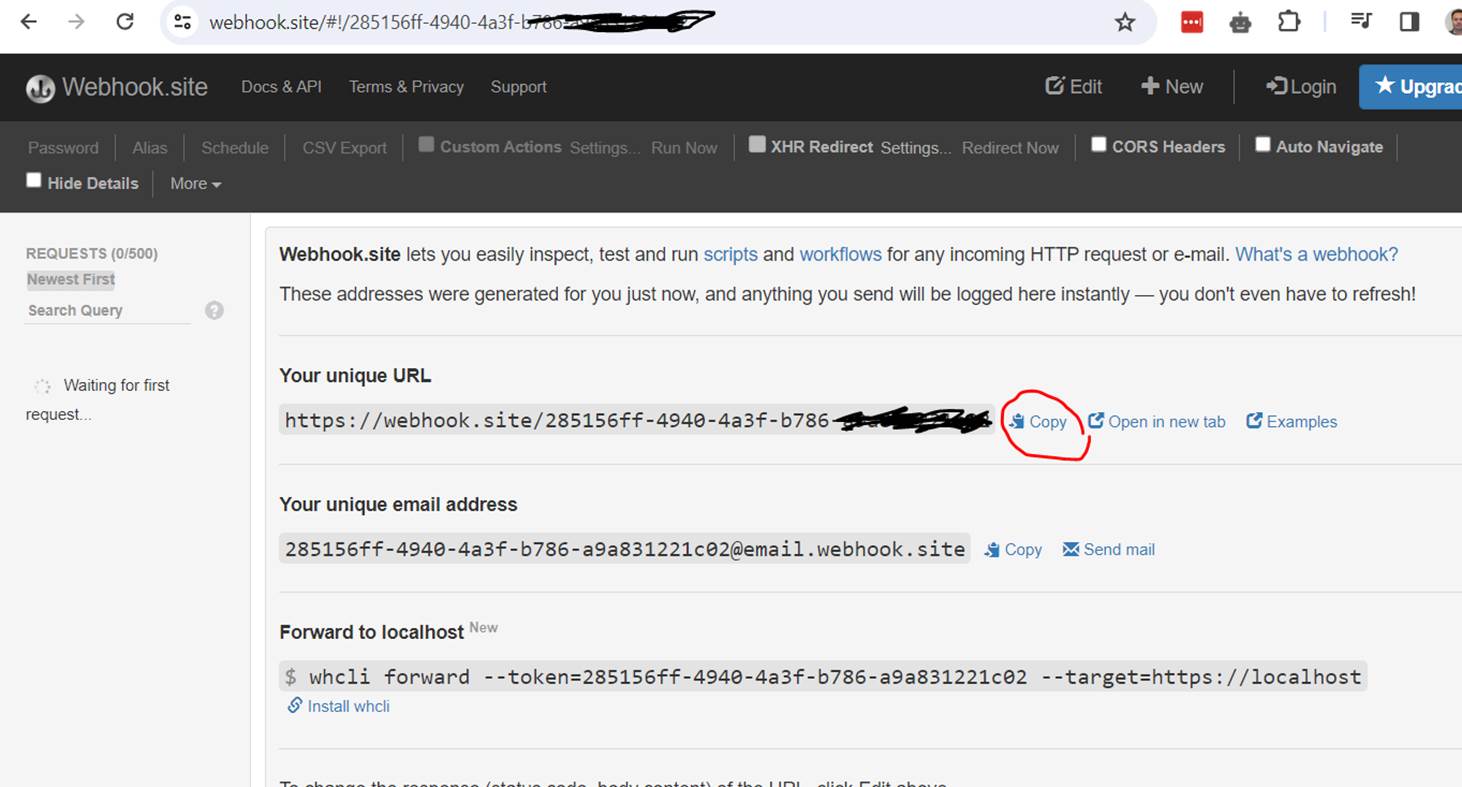
As an example, you can quickly test HTTP integration, using a free webservice from Webhook (www.webhook.site). To setup this integration, go to the Webhook website, and copy the URL created for you:
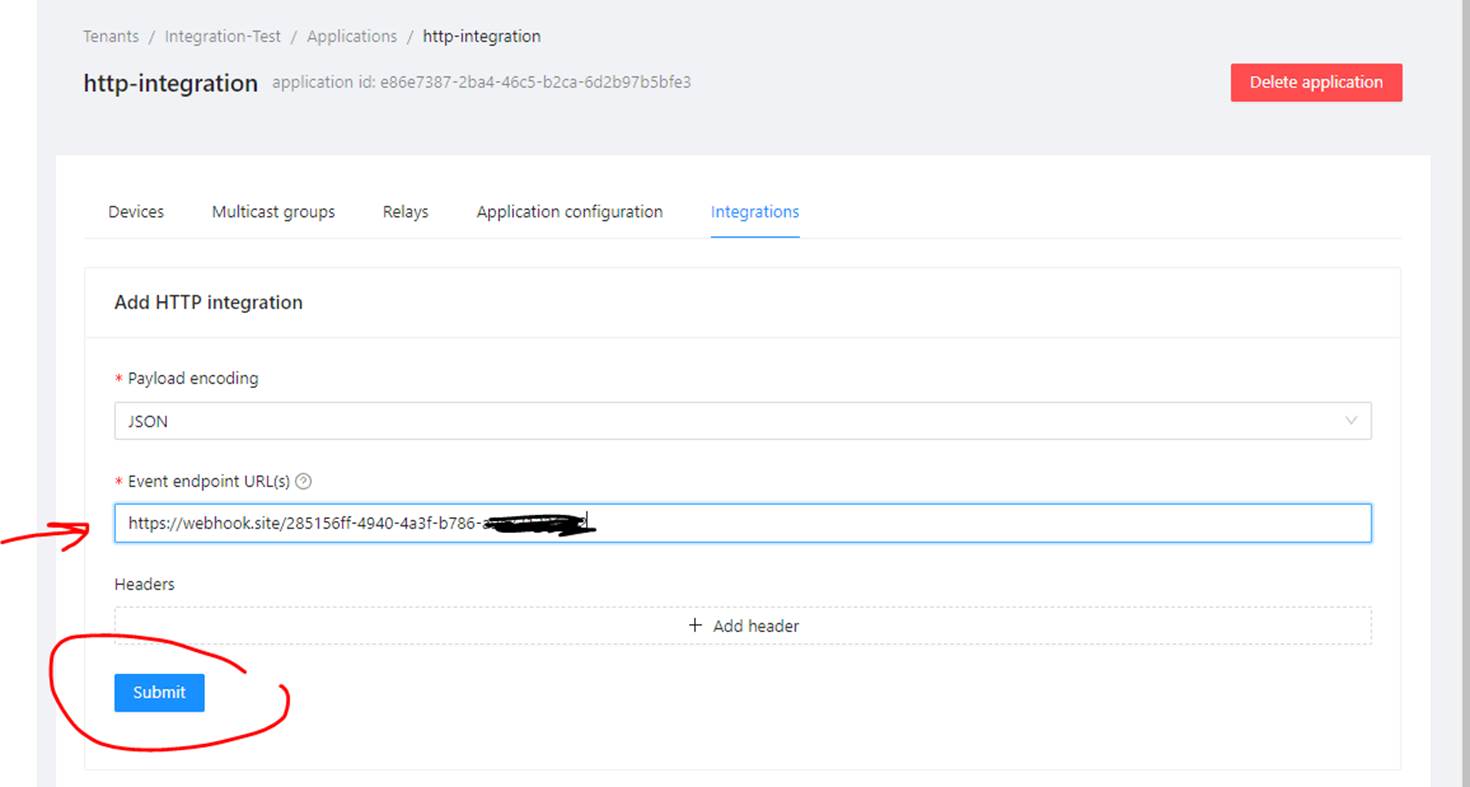
Open the Integrations tab in your application and paste the URL into the “Event endpoint URL”. Multiple URLs can be separated by a comma, as shown below.
Select JSON as the “Payload encoding” and click on “Submit” button.
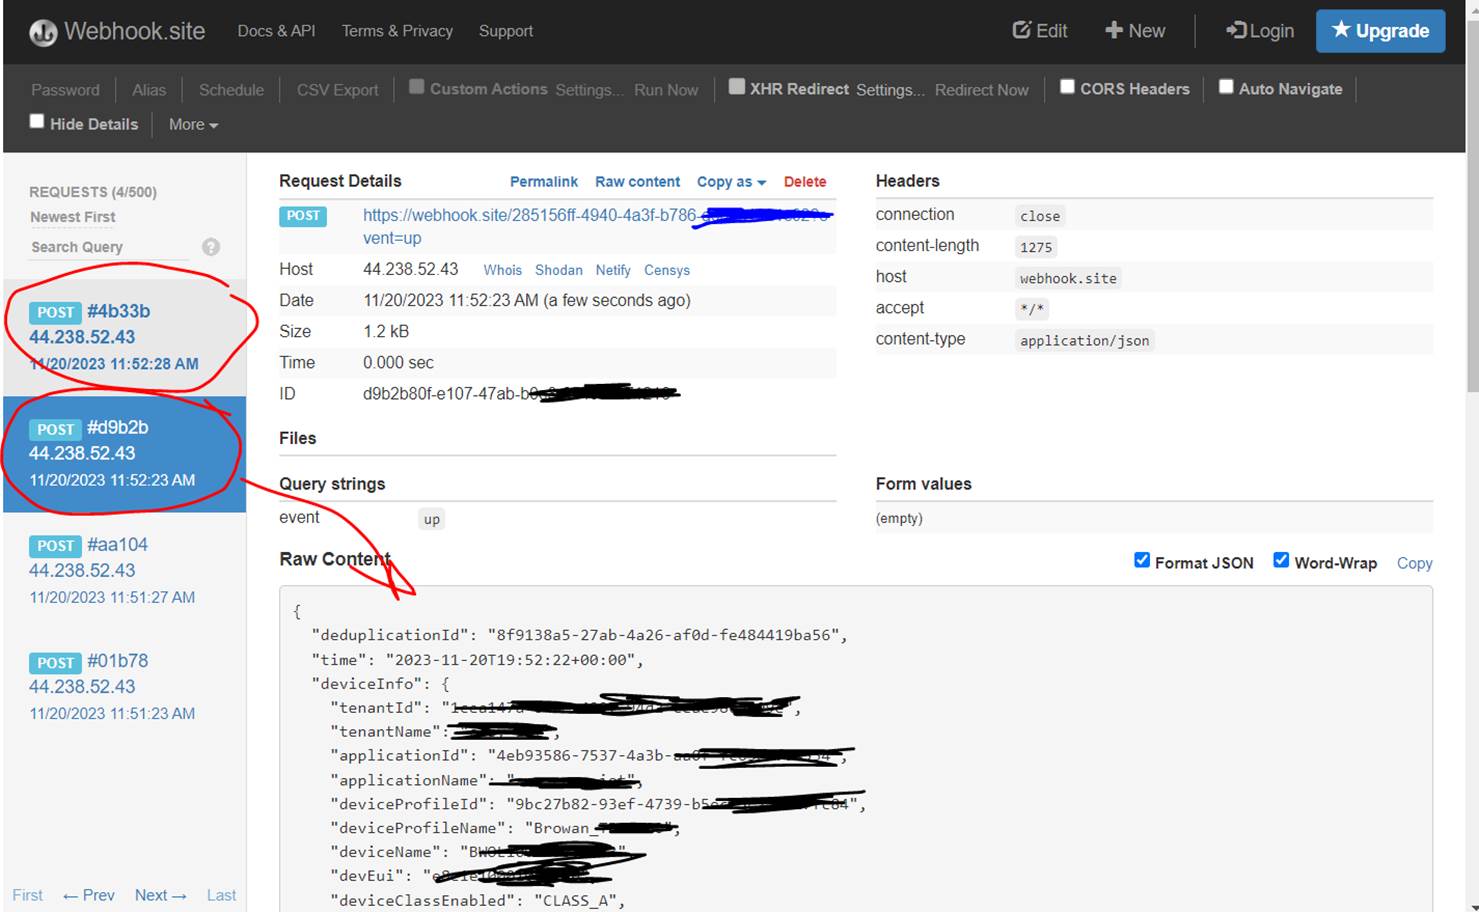
From now on, each packet received by the console will be forwarded to the Webhook site. Go back to this site, and check the packets are there;
Be sure to visit www.iot-lorawan.com for latest updates.